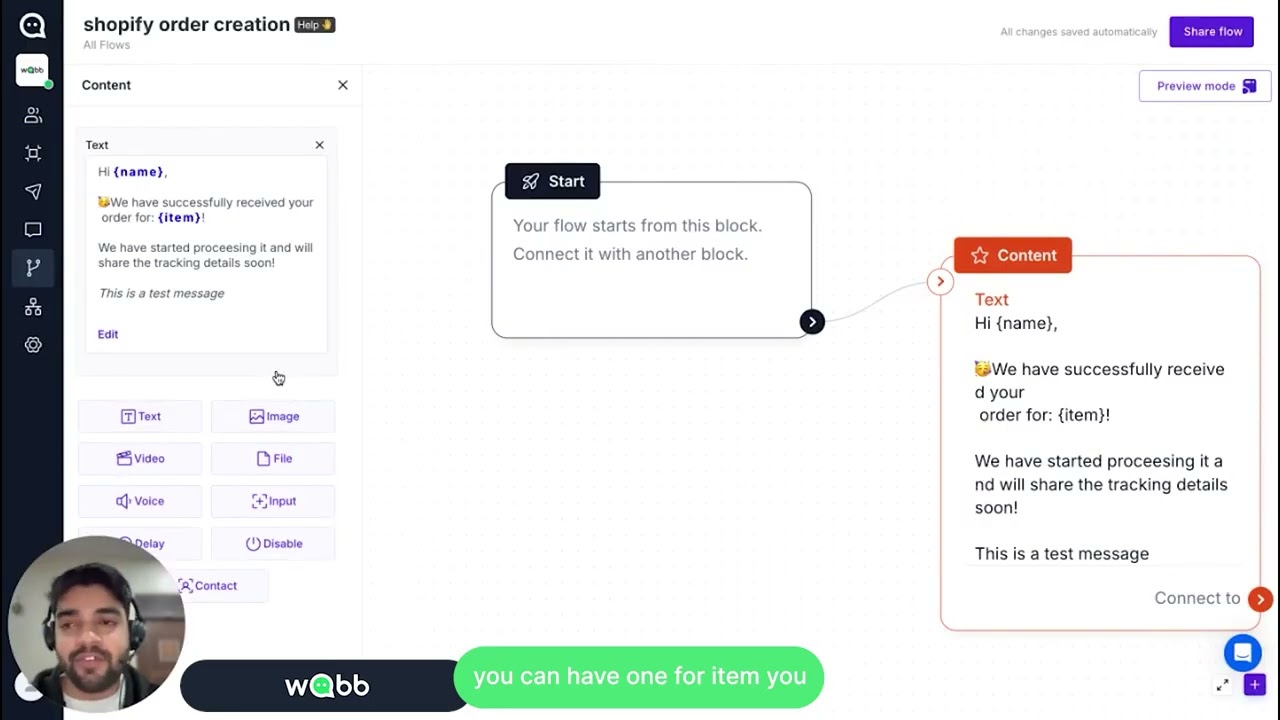
Here are two methods to set it up depending on your Shopify plan:
This is the setup guide behind WhatsApp + Shopify: How to Automate Orders, Support and Sales. That article covers what to automate. This one covers how the events actually get into WABB.
Method 1: Using Shopify Flow (For Shopify Plans greater than Basic)
If you're on a Shopify plan above Basic (i,e. Grow, Advanced, Plus), you can use the Flow app:
Log in to Shopify Admin Panel
Go to your Shopify admin dashboard. The URL usually starts with https://admin.shopify.com/.
Install the Flow App
- From the left menu, click on Apps.
- In the search bar, type “Flow” (this app is free).
- Install the app on your Shopify dashboard.
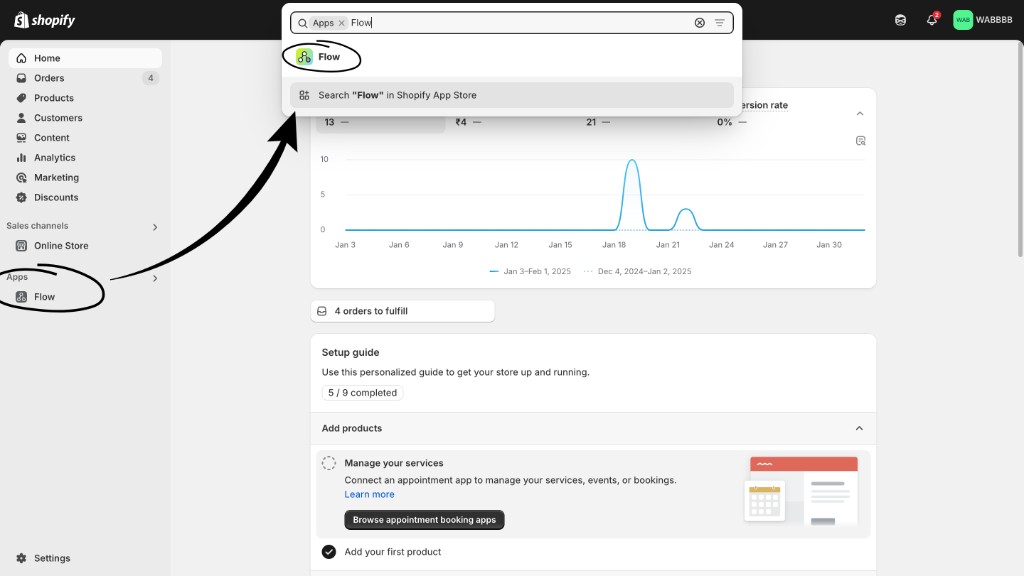
Create a Workflow in Flow
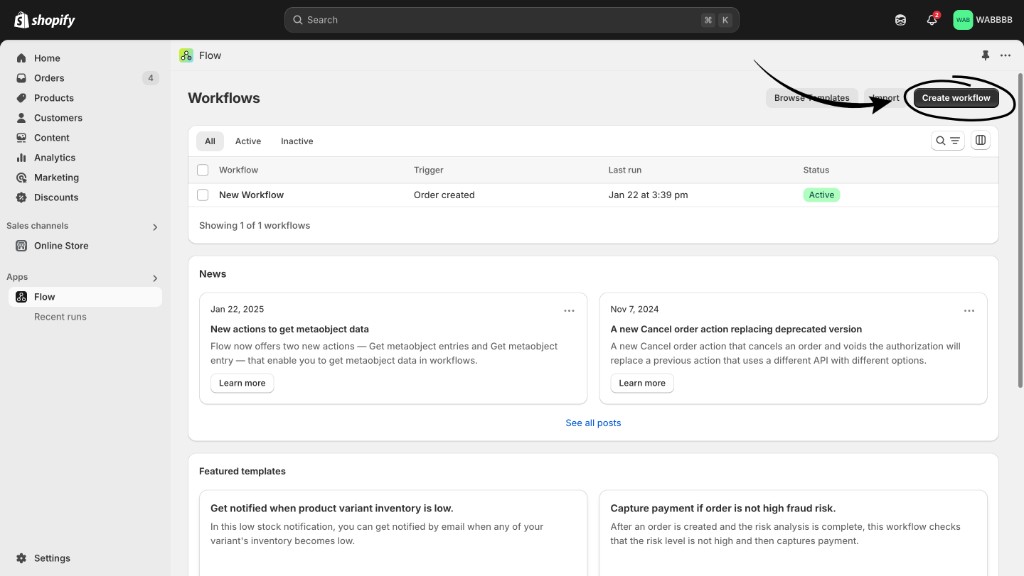
Open the Flow app and click Create Workflow.
A new window will open where you need to click Select a Trigger and choose “Shopify.”
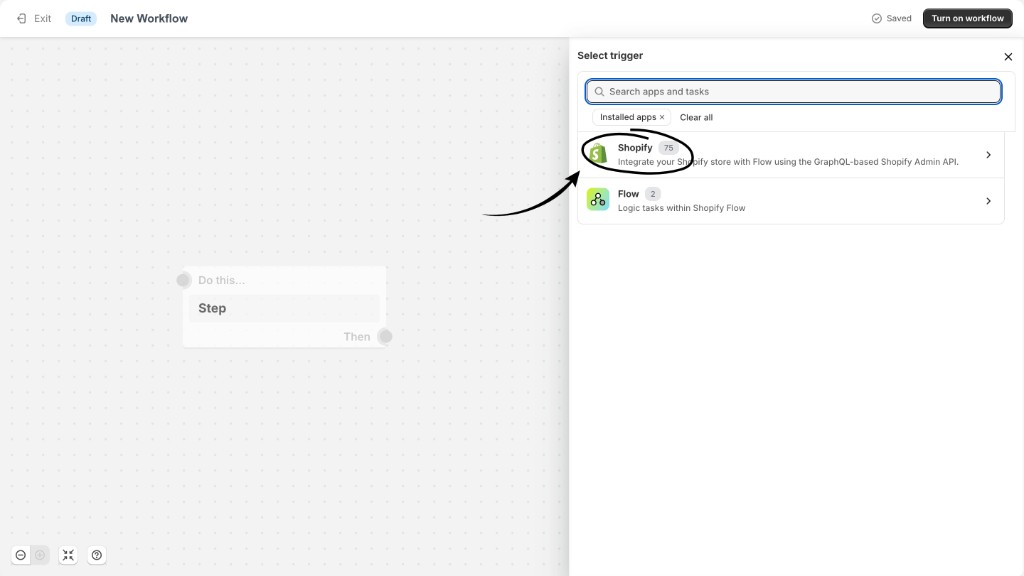
Choose a Trigger
Pick an event that should trigger the webhook. For example:
- Customer abandons checkout
- Order created/cancelled
- Refund created
Select the trigger that matches your need.
Set Up the HTTP Action
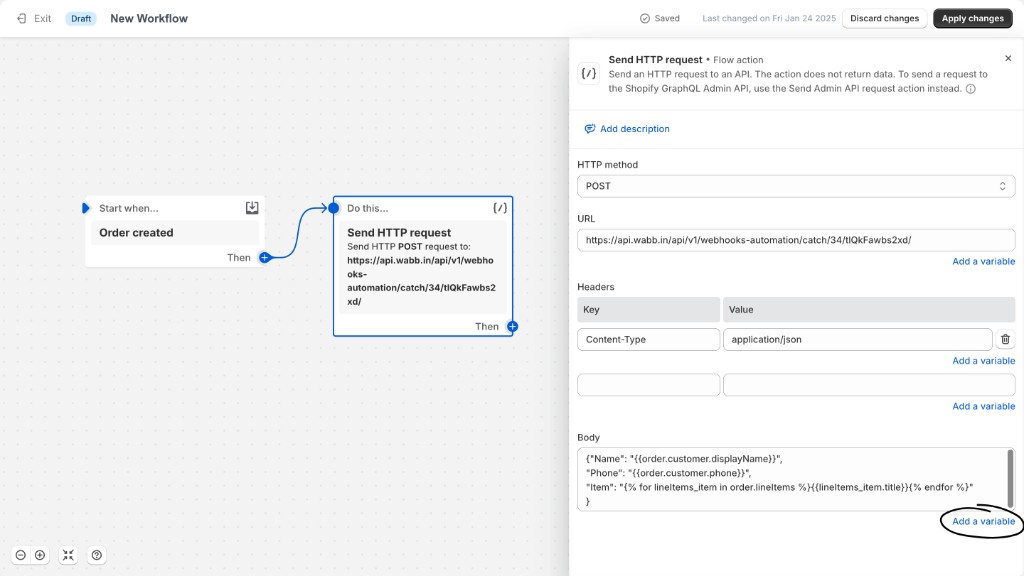
- In the workspace, click the block and select Action > Send HTTP Request.
- Under “HTTP Method,” choose POST (this is used to send data).
Get the Webhook URL from WABB
- Log in to WABB, go to the Webhooks section under Automation, and create a new webhook.
- Copy the webhook link from WABB and paste it in the URL field in Shopify.
Set Headers and Body in Shopify
Headers:
Key
Content-Type
Value
application/json
Body: Add the data you want to send. For example, if the trigger is “Order Created,” you might send:
{
  "Name": "{{order.customer.displayName}}",
  "Phone": "{{order.customer.phone}}",
  "Item": "{% for lineItems_item in order.lineItems %}{{lineItems_item.title}}{% endfor %}"
}
You can click Add a Variable to easily select the right fields like name, phone, or product details.
Save and Test the Workflow
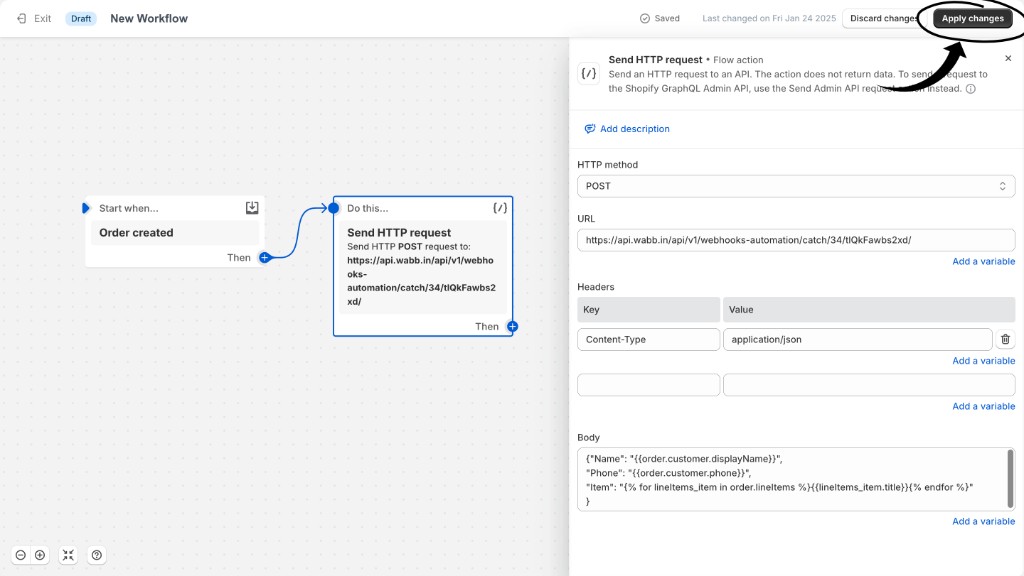
- Click Apply Changes and activate the workflow.
- Test it by creating a sample order in Shopify.
Method 2: Custom Webhooks (For Shopify Basic Plan)
If you're on the Basic plan, Shopify Flow isn't available, but you can still integrate using native webhooks:
Steps to Create Webhooks
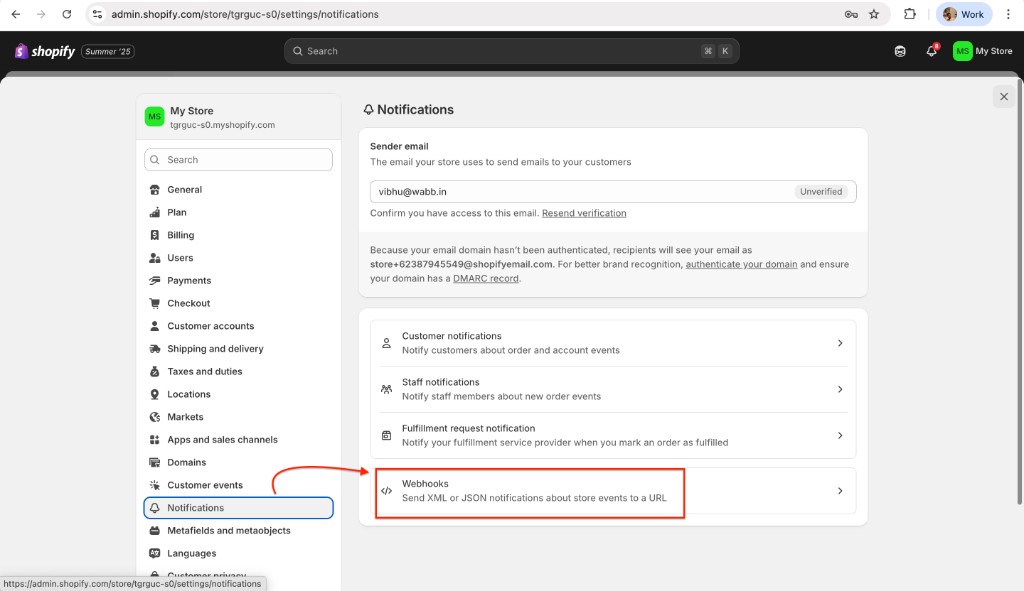
Navigate to Settings → Notifications in Shopify Admin
Click “Webhooks”
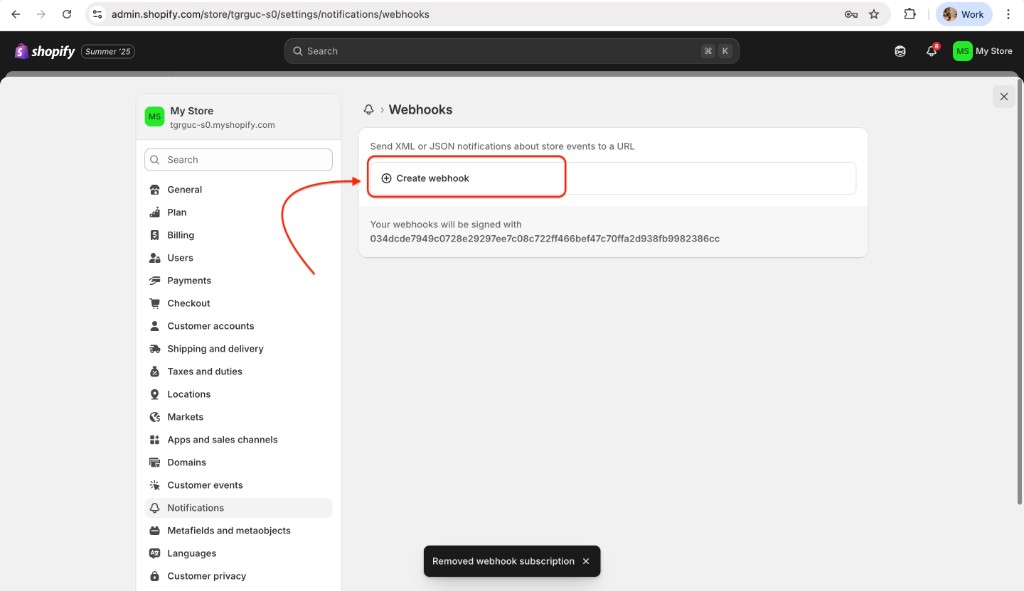
Click on “Create Webhooks”
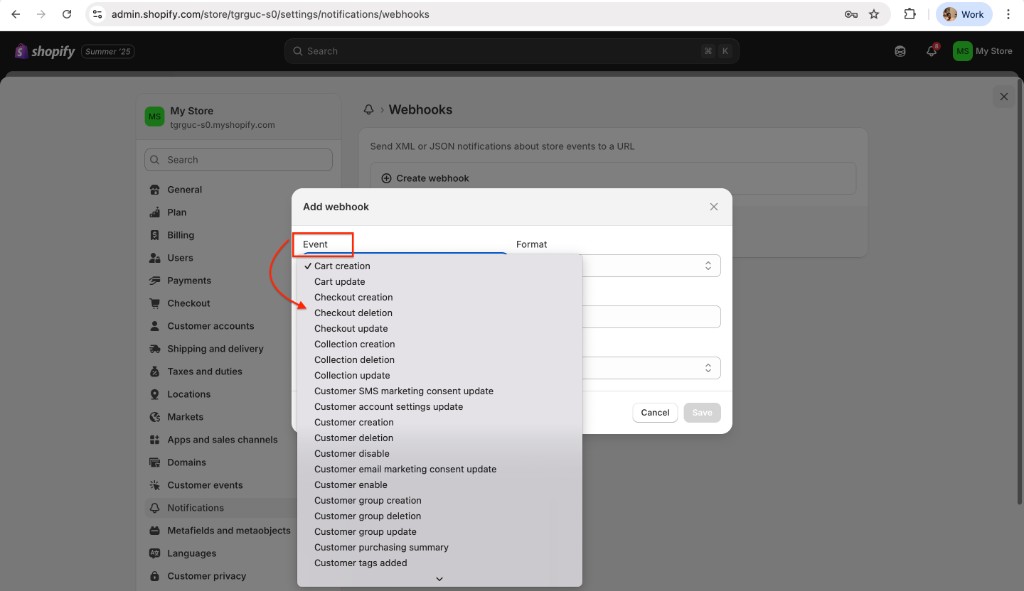
Select an Event
For example: Order creation, Order update, Cart creation.
Choose JSON format
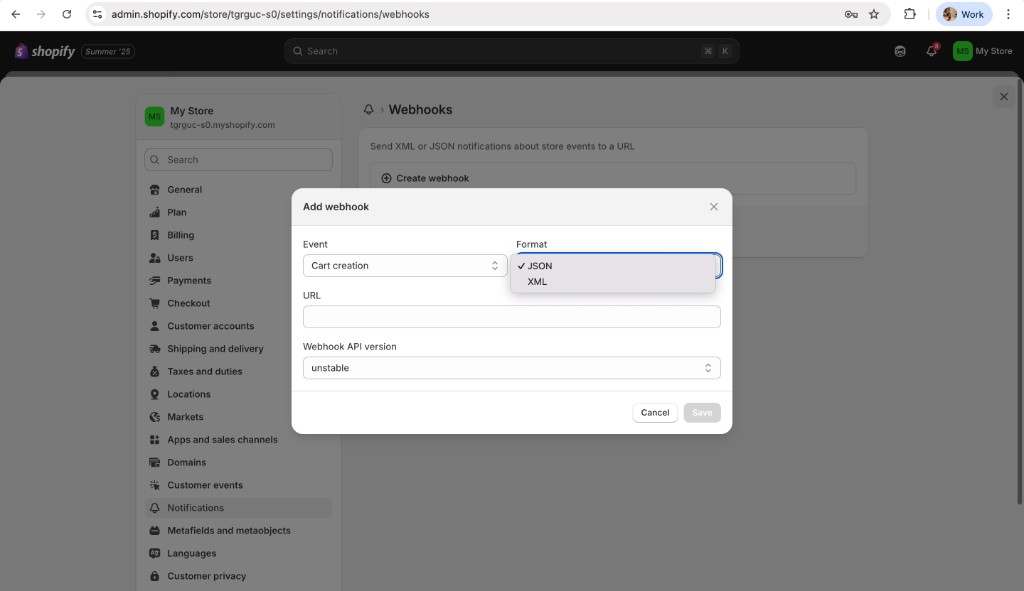
Paste your WABB Webhook URL
Check the section below on how to create a webhook URL.
Set the API version and click Save
Pick an API version, then save the webhook.
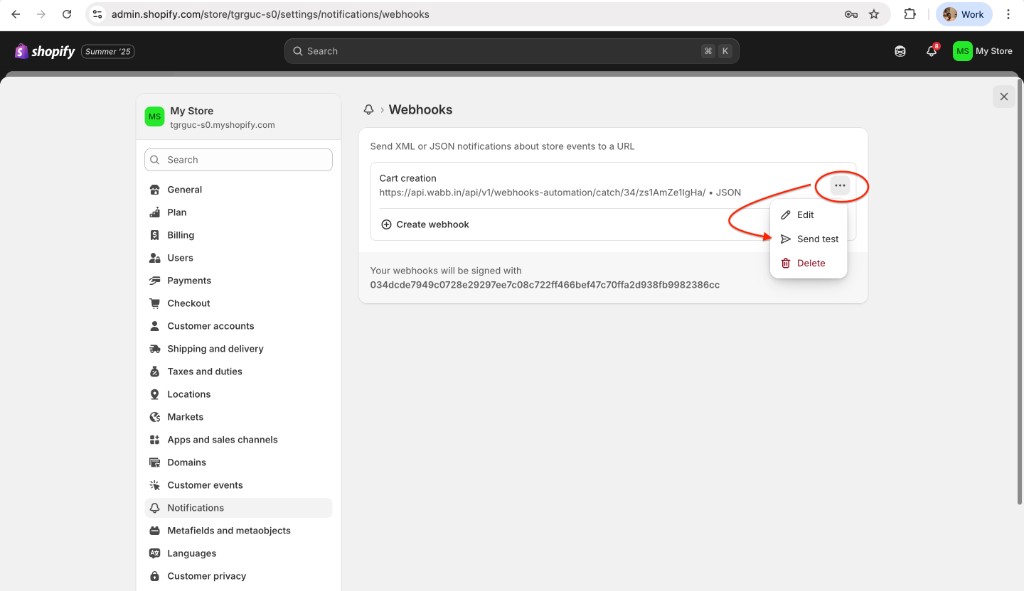
Click on “Send test”
This sends the test payload to WABB.
Important Note on Cart Abandonment
Basic plan limitation
Shopify Basic plan does not include Cart Abandonment event.
To recover abandoned carts:
Upgrade to Flow
Upgrade your Shopify plan to access Flow.
Use a connector
Use a third-party automation tool like Make, Zapier, or others to detect cart inactivity and trigger WABB messages.
What to send once the event arrives is covered in the abandoned checkout section of the automation guide.
Setting It Up in WABB
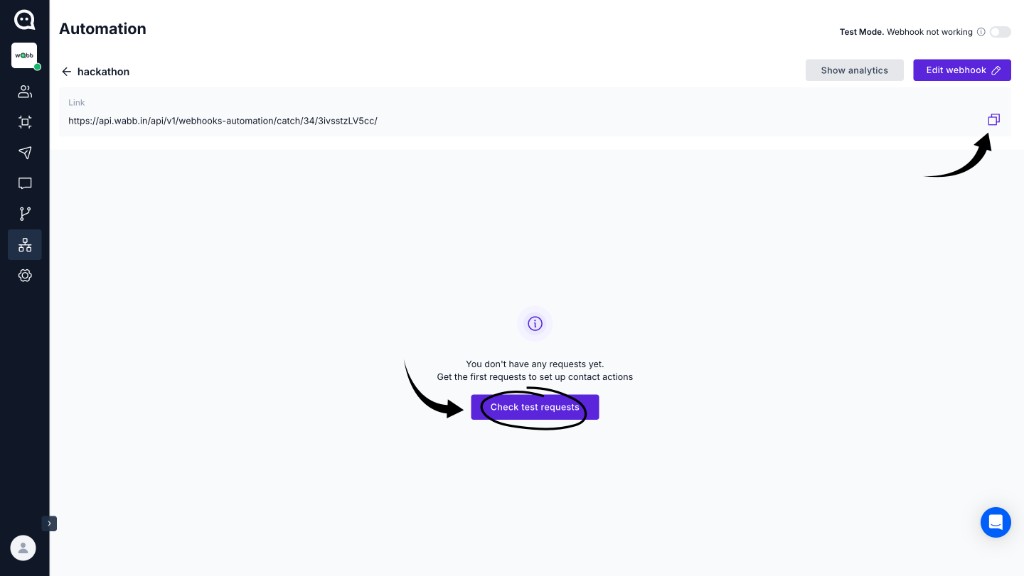
Check Incoming Data
- Go to the Webhooks section in WABB and open your webhook.
- Refresh the page, and you’ll see the test data appear. For example:
Map Data Fields
- Under “WhatsApp Number,” choose the field for the phone number.
- If you want to save the contact for future use, check mark Create/Update Contact Name section and map the customer’s name.
Store Data in Custom Fields
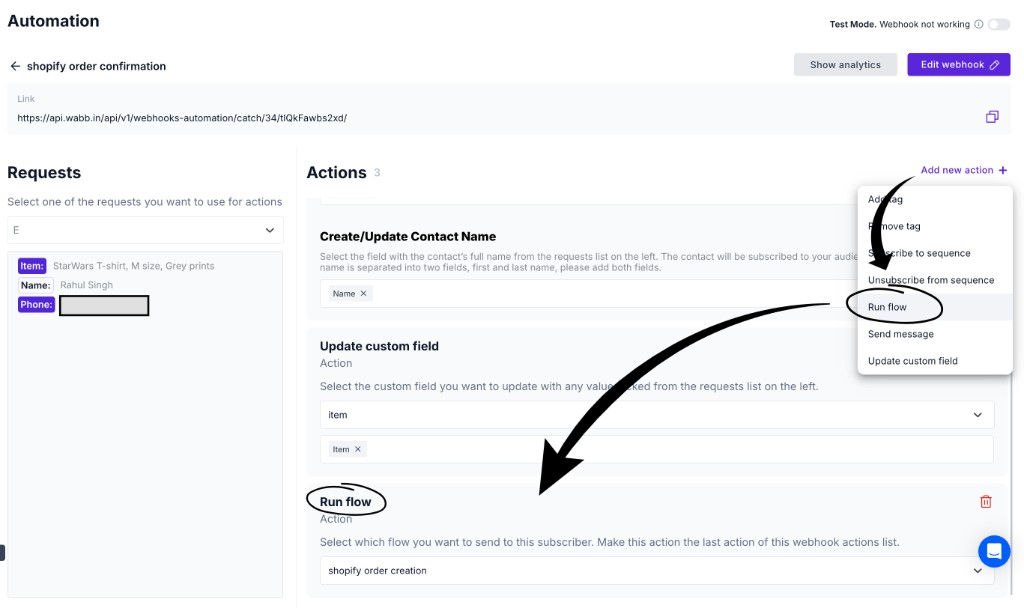
- Click Add New Action and select Update Custom Field to store data like product names.
- Make sure the custom field type matches the data type (e.g., text or numeric).
- For example, store: StarWars T-shirt, M size, Grey prints in a custom field called “Item.”
Create a Flow in WABB
Create a message template with placeholders for the data. For example:
Example WhatsApp template
Greetings from [Store Name], We’ve received your order for {Item}. It’s being processed and will be shipped within 2-3 days. Thank you for shopping with us!
Once flow is created you can add another action to send a flow, and choose the right name of the flow.
Go Live
- Once everything is set up, toggle the webhook live.
- Now, whenever a customer places an order, Shopify will send data to WABB, and WABB will send updates on WhatsApp automatically.
Notes
- Always test the webhook before activating it.
- Double-check that each data field is mapped correctly.
- Match custom field types with the data (e.g., text or numeric).
- Need help? Contact WABB support anytime!
That’s it! This setup takes just 10-15 minutes, and once done, it runs on autopilot. You can use the same steps for other events like cart abandonment, order cancellations, or refunds.
Ready for the workflows this unlocks?
WhatsApp + Shopify automation guideFAQ
Common Questions
How do I connect Shopify with WABB?
Create a webhook in WABB, then send Shopify events to that URL — either through Shopify Flow on Grow, Advanced, or Plus, or through native webhooks on the Basic plan. Map the incoming fields and attach a WhatsApp flow.
Do I need Shopify Flow to connect WABB?
No. Flow is the cleaner option on Grow, Advanced, and Plus. On the Basic plan you can still connect using native webhooks under Settings → Notifications.
Can the Shopify Basic plan send abandoned-cart events to WABB?
Not natively. The Basic plan does not include a cart-abandonment event. Upgrade to a plan with Shopify Flow, or use a connector such as Make or Zapier to detect inactivity and trigger WABB messages.
Where do I get the WABB webhook URL?
In WABB, open Automation → Webhooks, create a new webhook, and copy the URL into Shopify Flow or the native webhook form. See WhatsApp webhooks for how WABB uses inbound events.
What Shopify data can WABB use in a WhatsApp message?
Whatever you send in the webhook body — typically customer name, phone, product, and order details. Then map those fields to a WhatsApp number, contact name, and custom fields in WABB.
Do I need a custom backend to connect Shopify and WhatsApp?
No. Shopify posts JSON to the WABB webhook, WABB maps the fields, and a WhatsApp flow sends the message.